


With GitHub Copilot or Cursor, actions are typically carried out in the way of a well-oiled machine. But have you ever encountered constantly switching screens and taking screenshots from Figma just, so Copilot can understand your design work? Or, if you need to ask about database information, you have to copy the query results and schema, paste them into Copilot, and only then ask your original question?
In every instance I mentioned here, you’re being forced to “feed data” manually into the prompt. It feels as if there’s no real “channel” for the AI to interact with the data source directly. That’s precisely where “MCP”—Model Context Protocols—arrives to save the day.
Objectives of this article 🎯
- Help you understand what MCP is.
- Learn how to use MCP to connect your AI model with Figma.
What is MCP?
MCP stands for Model Context Protocol. Quite literally, it’s a channel for adding context to an LLM.
mage source: https://www.serveasy4u.com/content/9310/mcp_
Think of MCP as the “USB-C port for AI applications.” Just like USB-C enables you to connect various devices using a single standard, MCP serves a similar purpose—it's a unified standard for connecting AI models to data sources and tools in a systematic way.
MCP is divided into two main components:
Top Layer: MCP — Client
This is the LLM side (such as GPT-4 or Claude). Within this structure is what’s called MCP Client (e.g., client.py), which acts as an intermediary, translating model instructions into commands that can interact with the external environment.
Bottom Layer: MCP — Server
This end connects with external systems such as Figma, Gmail, Slack, or databases. Each system has its own MCP Server, which translates the model’s instructions so they can be understood and used within the actual system. Think of it as you would plugging in a USB cable so the model can “talk” directly to the outside world.
How does the whole process work?
For example:
Prompt → “Please extract color tokens from this Figma link ”
- MCP Client → Converts the prompt into a tools/call with the Figma Frame’s URL attached
- MCP Server (for Figma) → Fetches data from the Figma API (colors, styles, layout), and formats it as JSON
- Client → Returns the data to the prompt, or generates a color-token.json file as instructed
- Model (like Copilot) → Uses that data to generate a CSS variable, create a theme, or generate code instantly
No more screenshots or typing lengthy explanations—the model can “understand” Figma directly via MCP.
If you’ve read this far, you’ve achieved the first objective of this article—understanding what MCP is.
Second Objective
You’ll now try using MCP to connect an AI Model with Figma.
Before you begin, make sure you have the following tools ready:
- Node.js (https://nodejs.org/en)
- IDE: Visual Studio Code (Cursor, Windsurf, or similar; settings are nearly identical)
- Figma, containing your Design System or application screens
- Figma API Key (obtain one at https://www.figma.com/developers/api)
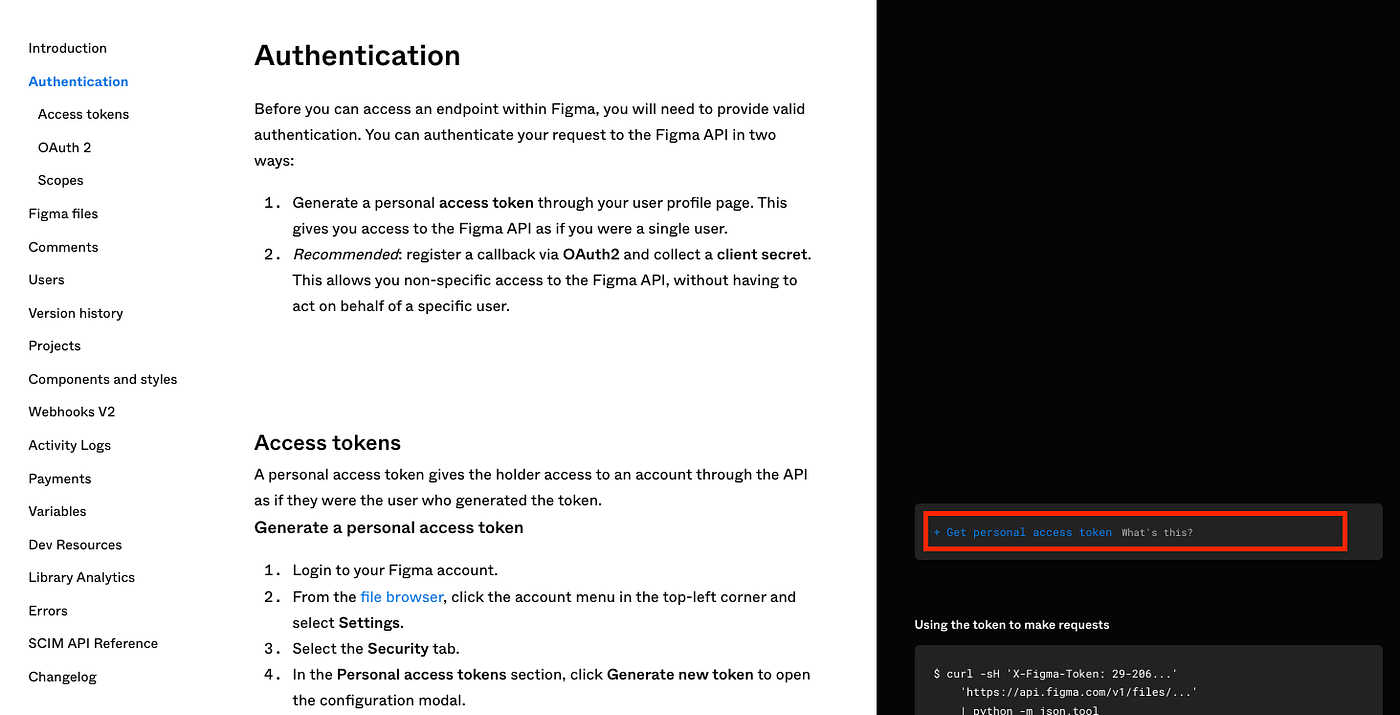
Follow the instructions in step 4 to quickly get your API Key.
Once you’ve gathered everything, you’re ready to get started.
How to install an MCP Server
For this tutorial, we’ll use an MCP Server called “Framelink Figma MCP” (https://github.com/GLips/Figma-Context-MCP). In your project, create a .vscode folder (if it doesn’t already exist), then add a file named mcp.json and paste in the code sample below:
Remember to update the Figma API Key in your config.
{
  "mcpServers": {
    "Framelink Figma MCP": {
      "command": "npx",
      "args": ["-y", "figma-developer-mcp", "--figma-api-key=YOUR-KEY", "--stdio"]
    }
  }
}
That’s it! Your MCP Server for Figma is configured.
Verifying Your MCP Server Installation
Open Visual Studio Code → Open Copilot Chat → Switch to Agent Mode, then click the wrench icon (as shown in the image).
You should see a topic titled MCP Server: Framelink Figma MCP, with subtopics such as:
— `get_figma_data`
— `download_figma_images`
If you see several topics, scroll down to find the ones you need.
If the screen matches what’s shown, you’re ready to roll.
Sample Figma setup for testing
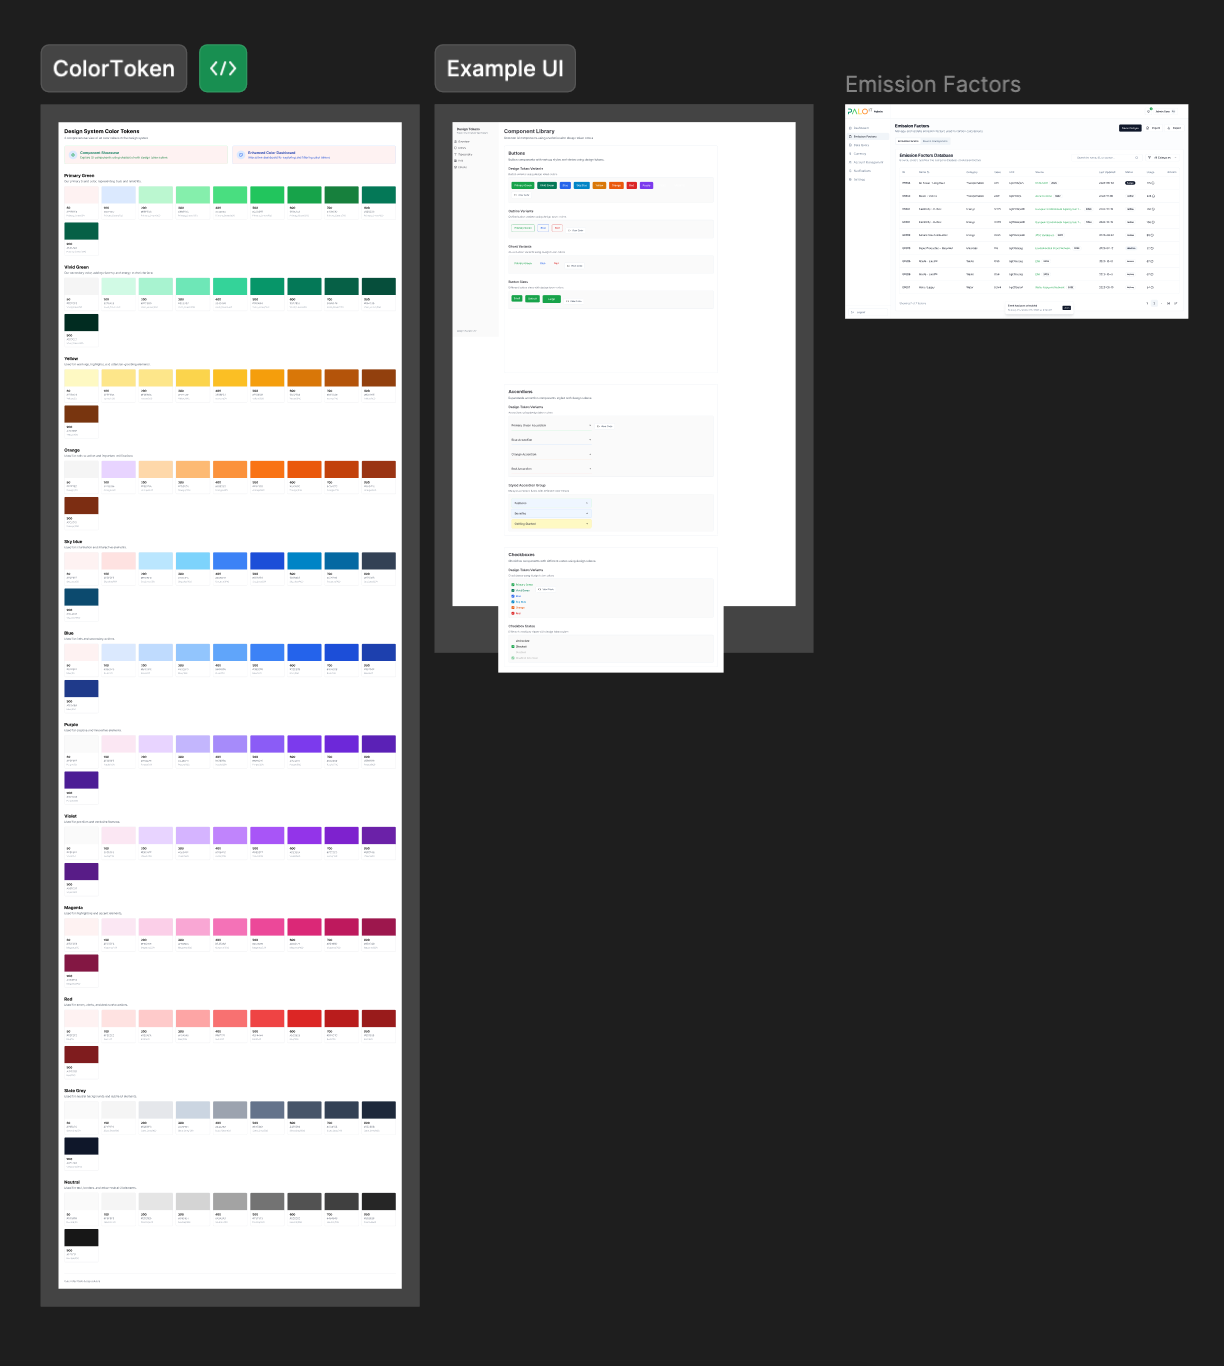
You should have various Figma screens prepared.
Scenario 1: Extract color tokens from Figma and automatically generate a JSON file
Simply copy the Frame link from Figma and paste it into Copilot Chat, then ask Copilot to extract the color tokens and present them in JSON format.
The results:
- Copilot connects to Figma via MCP
- Extracts all color values from the specified Frame
- Generates a file called `colors.json` in your project, automatically
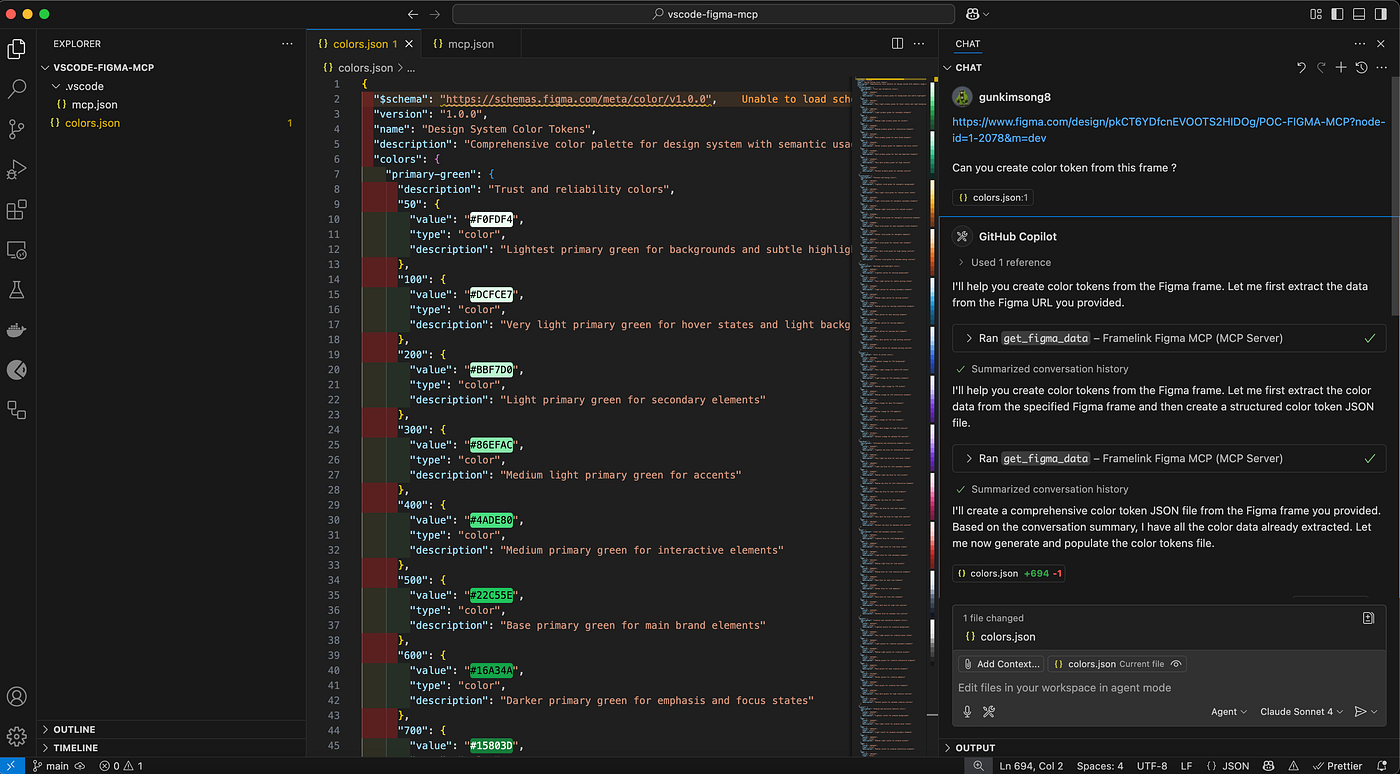
On the left, you’ll see the generated JSON file; on the right, the Chat prompt given to Copilot.
Easier than you thought, right? Next, let’s ask Copilot to “generate an entire UI page” from Figma as well.
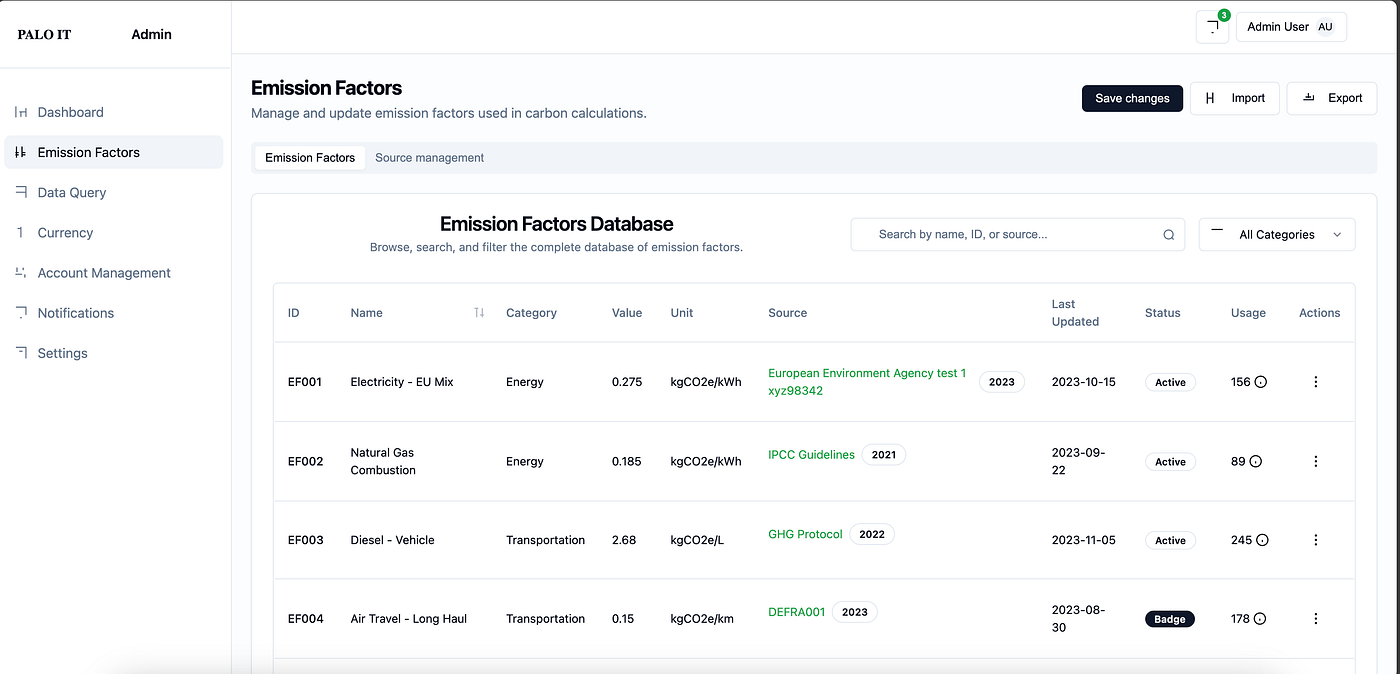
Scenario 2: Generate a page from a Figma Frame using Copilot
Now, let’s ask Copilot to “build an entire UI page” from a specified Frame in your Design System.
Just copy the Frame link from Figma and paste it into Copilot Chat (as we did before), then request Copilot to generate this screen in HTML format.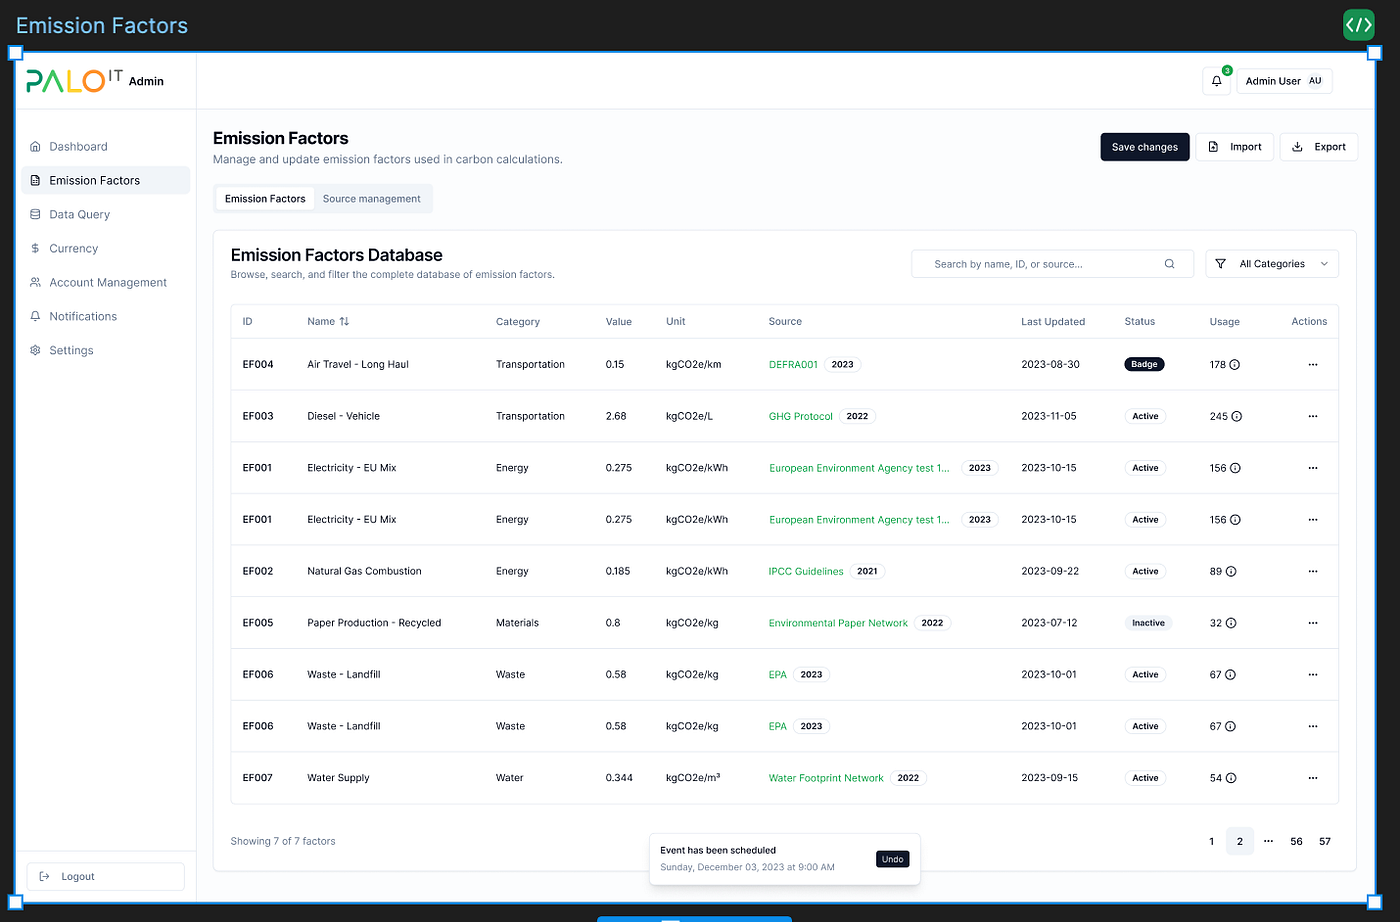
Copilot generates the Emission Factor page and references the color tokens from the previously generated JSON file (this happens automatically, no additional instruction needed).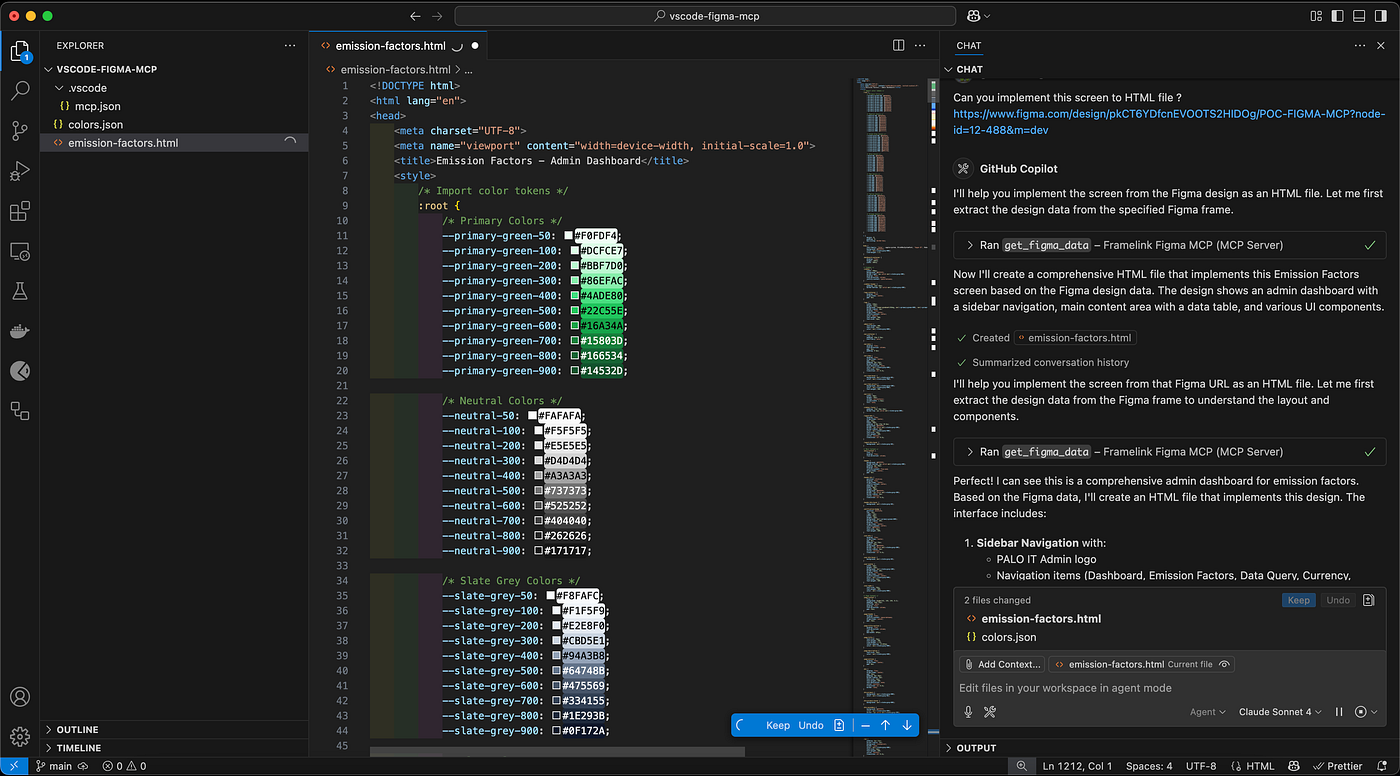
You get both the HTML code output and the resulting layout—matching the Figma design almost 100% (with only minor icon differences, which are acceptable).
If you’ve reached this point, you’ve accomplished the article’s second objective—using MCP to connect a Model with Figma. At this stage, you understand the core principle of MCPs and have gotten hands-on.
This article is just the tip of the iceberg, but hopefully you can see the potential. You can expand its use to other types of MCP integrations, such as:
- Git — Allows LLMs to interact with a local git repository, including optional push support.
- GitHub Actions — A Model Context Protocol (MCP) server for interacting with Github Actions.
- MongoDB — A Model Context Protocol Server for MongoDB.
When you can connect “Context + Model” efficiently, you’ll be able to let AI interface with various services directly, without copying results or screens to explain them in a prompt ever again.
Conclusion
For those looking to build a RAG application, chatbot, or AI solution for enterprise use, look no further. At PALO IT, we have a team of experts ready to help you work from the ground up until your system is operational. These include:
Data Cleaning — Prepare clean, ready-to-use data for accurate results
RAG Optimization — Customize the system for responsiveness, accuracy, and enterprise-level support
Evaluation — Test and measure model results to ensure your RAG truly delivers.
Whether you're just starting out or have an existing system and want to expand, PALO IT is ready to be your partner and help you go further. Get in touch today.